Okay so now I've had a fantastically refreshing sleep, it's back to getting this blog updated to where I'm currently at, and so we continue on with the Skybox Creation and the steps taken to achieve it.
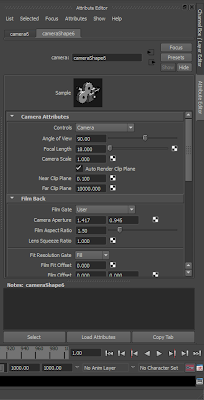
To the left here is the general camera settings and below are the render settings.
Note that each render will be a 4k Square map, this is to preserve the highest quality as I'm going between programs and any scaling for optimisation of file size will be done once the cubic map is finished.
Note that each render will be a 4k Square map, this is to preserve the highest quality as I'm going between programs and any scaling for optimisation of file size will be done once the cubic map is finished.
Below you can see the render settings I have used. No cameras are currently selected as per each render this has to be changed.
Below you can see the positioning of the cameras within the scene.
With the above settings all finalised I can render out the 6 images I will be taking with me into SkyPaint to produce my 360-degrees seamless panoramic skybox.
Render #1 (Galaxy_FT):
Render #2 (Galaxy_UP):
Render #3 (Galaxy_BK):
Render #4 (Galaxy_DN):
Render #5 (Galaxy_LF):
Render #6 (Galaxy_RT):
With the above renders complete, I can now take them into the program of SkyPaint and create my seamless skybox for the level.


No comments:
Post a Comment