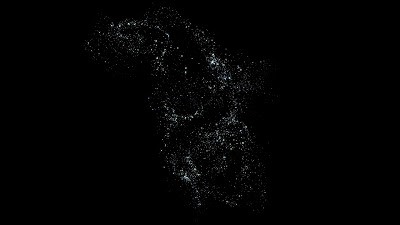
In the very early stages of this project I mentioned my intention to make use of the Render Paint Effects tool that is contained within Maya to help me create a highly detailed skybox that would encompass the level for my game.
I started producing this utilising the galaxy brush located in the Get Brush menu for that tool.
With the tool selected I created what would be the base spline from which the post-processed star/galaxy fields would be generated and then after tweaking the tool settings to a point at which I believed them to be at an aesthetic setting.
The picture below shows what I eventually achieved after a great deal of tweaking.
The picture below shows what I eventually achieved after a great deal of tweaking.
With the above settled, I began the task of duplicating and tactically positioning around the World Co-Ordinate 0 to create a spherical layout. This began simply by initially creating a bowl shape on one side, then grouping and rotating around World0 to make sure a similar distance is kept.
Each paint effects spline has a random seed applied to it so every single spline (while the same base shape) emits a completely different set of post-processing particles creating a truly unique space environment.
Above you can see the skybox from outside of it's intended view, this at approximately 45% completion. I further tweaked this tidy up alot of the spline placement and then also played around with many of the splines distance from where the camera rendering out the panaromic shots would be to create a stronger illusion of depth.
After finishing up to the 50% mark I then grouped and rotated the Paint Effects to encompass the entire area around World0 as can be seen in the picture below. Further below that picture is a rendering of what that entire area looks like.
Below is the visible setup from within the Maya viewpoer and then further below is a rendering from inside the skybox (at World0). It was imperative to make sure that none of the lines truly overlapped and as a consequence cause a great deal of inconsistency in the skybox.
Now that the skybox base has been complete I can get a render produced at the 6 standard angles(each camera set specifically to 90degrees Field-of-View). Then using a program called Skypaint and it's pipeline into Adobe Photoshop via plug-in, I can stitch together a very high quality skybox for my game.
Before the next phase I decided to render out a video using the camera at World0 to scan around the skybox with the intention of checking for holes/patches, this way I had something tangible with which to brainstorm about.
Be Warned:
The camera in the following video has a FOV set to 90, this may cause motion sickness in some people due to the fast paced nature of the object. However by stopping and starting the video at different intervals you can get a really good feel for the stars surrounding the level.
It is my intention that once the final panoramic is complete that I will try to make use a great deal of NASA stock footage to add nebulae's, auroras, gas giant clouds, basically all the things that makes space so wonderous and exciting! :)
To Be Continued....


No comments:
Post a Comment